Zucchini Bread

10487244_10100507456974284_5280103645338560768_n

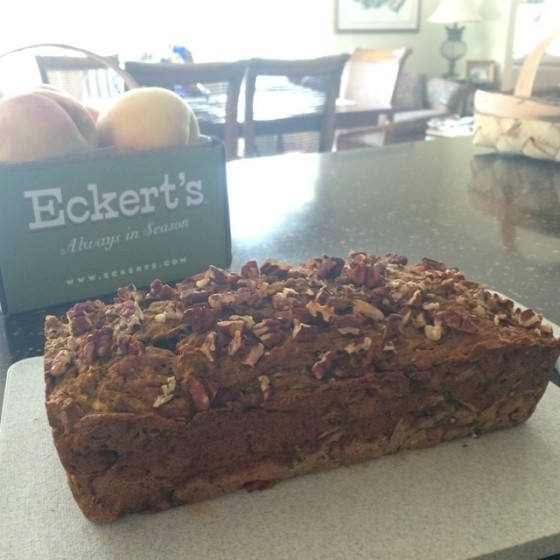
Zucchini’s are a staple of summer. I love them in all kinds of ways, but one of my absolute favorites has to be baked inside of a healthy bread.

This recipe was adapted from one I found via Whole Foods, but I made it even better by swapping in honey for sugar, and olive oil for canola oil. I also had some pure pumpkin puree leftover from the scones I shared with you in my last post, so I used that instead of yogurt. This bread is dense but healthy and delicious. It’s a totally guilt-free breakfast, snack, or dessert. This bread is not very sweet, so it’s good with jam or honey on top. If you would like a sweeter version, you can click on the Whole Foods link below for a recipe with sugar in it.

Zucchini Bread

Recipe adapted from Whole Foods

Ingredients:

  • Natural cooking spray
  • 1 1/2 cup whole wheat flour
  • 1/2 teaspoon salt
  • 1/2 teaspoon baking soda
  • 1/2 teaspoon baking powder
  • 1 teaspoon ground cinnamon
  • 1/2 teaspoon freshly grated nutmeg
  • 1 egg
  • 1/3 cup olive oil
  • 1/3 cup unsweetened applesauce
  • 2 tablespoons nonfat plain yogurt (or pumpkin puree)
  • 1/4-1/2 cup honey (to taste)
  • 2 teaspoons vanilla extract
  • 1 cup grated zucchini
  • 1/3 cup finely chopped walnuts

Preparation:

Preheat oven to 350°F. Spray an 8-inch loaf pan with natural cooking spray and set aside.

In a large bowl, sift together flour, salt, baking soda, baking powder, cinnamon and nutmeg. In a separate bowl, whisk together egg, oil, applesauce, yogurt/pumpkin puree, honey, and vanilla. Add flour mixture and stir until well combined. Fold in zucchini and walnuts then transfer batter to prepared pan and bake until risen, deep golden brown and a toothpick inserted in the middle comes out clean, 50 to 60 minutes.

Note: As I’ve mentioned before on this blog, I don’t like to lose the crunchiness of nuts by baking them inside the bread, so I just toasted the walnuts and sprinkled them on top. You can do either or both, if you would prefer!

Cool in pan on rack for 30 minutes then remove bread from pan and continue cooling on rack.


Pumpkin Scones

Scones filter

My brother and I dedicated a good portion of this summer to the Harry Potter movie series. We called it our “Summer of Potter Festival,” and set out to watch every movie in the series over the course of about a month. When I’m having a dedicated movie night, I love to have relevant treats to snack on while I’m watching. So we drank a lot of British tea and ate a lot of popcorn and pumpkin scones.

We knew the festival would end eventually, but it was still sad when the day finally came. That doesn’t mean I can’t keep eating pumpkin scones though, right?

This recipe is from one of my favorite baking blogs and makes for totally scrumptious scones. My one deviation from the recipe was sprinkling the pecans on top at the end, rather than baking them into the scones. There’s just something I don’t like about nuts inside of baked goods … I need that crunch!

Pumpkin Scones with Brown Butter Glaze

Recipe from Joy the Baker 

Ingredients:

  • 3 cups all-purpose flour
  • 2/3 cup packed light brown sugar
  • 2 1/2 teaspoons baking powder
  • 1/2 teaspoon baking soda
  • 1/2 teaspoon salt
  • 1 teaspoon ground cinnamon
  • 1/2 teaspoon fresh grated nutmeg
  • 1/2 teaspoon ground ginger
  • 1/4 teaspoon ground allspice
  • 1/8 teaspoon ground cloves
  • 1 1/2 sticks (3/4 cup, 6 ounces) unsalted butter, cold and cut into small cubes
  • 1 cup buttermilk, cold
  • 1 cup pumpkin puree
  • 1 tablespoon pure vanilla extract
  • 1/2 cup coarsely chopped pecans

For the Glaze:

  • 4 tablespoons unsalted butter
  • 1 1/2 cups powdered sugar
  • 1 teaspoon pure vanilla extract
  • 3 to 4 tablespoons whole milk

Preparation:

Place rack in the upper third of the oven and preheat oven to 400 degrees F.  Line a baking sheet with parchment paper and set aside.

In a medium bowl, whisk together flour, brown sugar, baking powder, baking soda, salt, and all of the spices.  Add the cold butter to the dry ingredients and toss to coat.  Using your fingers or a pastry cutter, break the butter down into the dry ingredients.  Work quickly so that the butter remains cold.  Some of the butter will be the size of oat flakes, others will be the size of small peas.

In a small bowl, whisk together buttermilk, pumpkin puree, and vanilla extract.

Add the wet ingredients, all at once to the dry ingredients.  Stir together until almost thoroughly combined.  Add pecans and stir until no dry flour bits remain.  Using a large ice cream scoop, scoop scones dough by the 1/2-cupful onto the prepared baking sheet.  Leave about 2-inches of space between each scone.

Bake for 18 to 20 minutes or until browned slightly with dry tops.  You can insert a toothpick into the center of a scone to test for doneness.

Allow to cool completely before glazing.

To make the glaze, in a small saucepan melt butter over medium-low heat.  The butter will begin to crackle and pop.  After the crackling subsides a bit, the butter will begin to brown.  Continue to cook until the butter smells nutty and the butter solids begin to brown.  Immediately remove from the heat and transfer to a small bowl.

In a medium bowl, whisk together powdered sugar, browned butter, vanilla, and 2 tablespoons of milk.  Whisk together and add more milk as necessary until your desired consistency is reached.

Generously drizzle scones with glaze.  These scones are best served within 2 days of of baking.

Note: Joy mentions this recipe makes about 12 scones, but I must have made mine quite a bit smaller because I got upwards of 2 dozen small scones. They were the perfect size in my opinion. That is, you don’t feel badly about scarfing 2 or 3 at once. I also agree with Joy that the scones are best within 2 days. They were still ok after that, but became oddly soft which I didn’t love.

Strawberry-Peach Jam

Jam 1

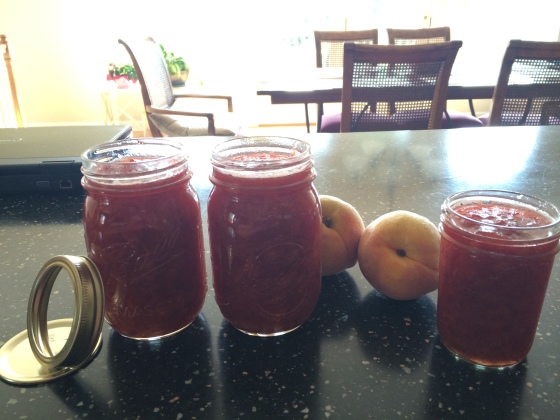
This past weekend I made jam. I love everything about jam: its simplicity, its seasonality, its versatility. Even just saying the word is fun. “Jam,” “jammy,” “jammin.”

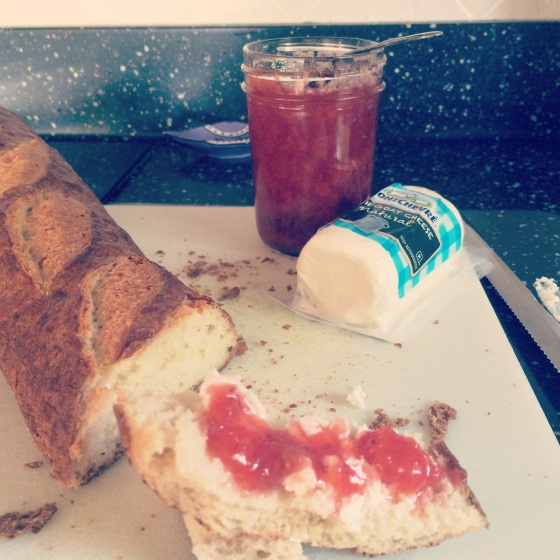
Jam can be part of literally any meal – you can top toast or pancakes with it for breakfast, spread it on some fresh, crusty bread for a sandwich, include it as part of a bread and cheese platter, or give ice cream a jammy top hat for dessert. Seriously, is there anything you CAN’T do with jam?

We had some farm-fresh peaches that I wanted to do something special with. Something that would last. So I decided to make jam! Strawberry-Peach Jam, to be specific. I based my jam off of an Ina Garten’s recipe, but did not stick to the amount of fruit (I added more), or cooking time (I cooked longer). It was incredibly delicious dolloped atop a pretzel baguette with goat cheese. :::swoon:::

Strawberry-Peach Jam

Recipe adapted from Ina Garten’s, “Fresh Strawberry Jam”

Ingredients:

  • 2 cups sugar
  • Lemon, zest and juice
  • 5 fresh peaches, peeled and chopped
  • Quart of strawberries, tops removed and chopped

Preparation:

  • The first thing to do is to get the skin off your peaches. This might seem a daunting task to some, but I’ve learned a handy trick. Bring a pot of water to boil. While waiting for water to boil, fill a bowl with cold water and ice cubes. Drop peaches into boiling water for 30 seconds to a minute. Remove with a slotted spoon and plunge into icy water immediately. When you remove them from the ice bath, the skin should practically remove itself!
  • Combine fruit, sugar, and lemon juice and zest into a medium-sized pot.
  • Cook over low heat until sugar dissolves and the fruit releases some of their delicious juices.
  • After cooking for awhile, I used a potato masher to carefully break the fruit down a bit more.
  • Continue to cook, until mixture is bubbling slightly. I let my jam cook for over an hour. It really depends how long it takes to set up.
  • To know when your jam is properly set, you should place a plate in the freezer. Once the jam looks, well, jammy, test its doneness by spooning a small amount onto the cold plate and if the juice gels, it’s done. If it’s still pretty runny, let it cook longer.
  • When done, pour into jars and consume as soon as possible without burning your mouth. Note: I did not follow my own advice.
  • I did not properly can my jars, because I knew the jam would be eaten within a couple of weeks, but if you would like to do so, the freezer canning method, or traditional canning method would both work (see link above).

Jam 3 Jam 6